Event Handling
Many Components allow you to determine the behavior that results from user interaction. Specifically, when a user Clicks a Component (e.g. a Button or Label), or changes a value in an input field (e.g. Input, Combo Box).
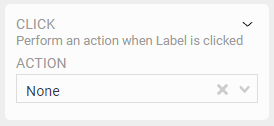
The first step is choosing the Action to take when the Event occurs, for example when a click is registered:
Actions
| Action | Description |
|---|---|
| None | Ignore the event |
| Set Tag | Set a new value on an OAS Tag |
| Set Screen Prefix | Change the current Screen Prefix for this user session |
| Go To Screen | Change the current Screen |
| Go To URL | Open a new external URL |
Set Tag
The most common action is setting an OAS Tag. When selected, additional configuration options are presented. Tag to Set - The OAS Tag to modify, subject to the current user's permission. While the action may attempt to set the Tag, if the Security Group for the current user does not allow writing to the Tag, this will have no effect. You can type the Tag path in directly, or use the Tag Browser to locate it.
Next is the method for setting the Tag
| Option | Description |
|---|---|
| Toggle | Only available for Boolean Tags, this will toggle the current live value, e.g. setting a current false value to true, which is very useful for creating toggle switches. |
| Fixed Value | A static value to send to the OAS Server for that Tag |
| Control Value | The value of another component on the Screen. e.g. using a separate input field for capturing user input, and then sending that value when the current Component event is triggered. The default is the Current Component, but other Components on the Screen that capture a value will be available to choose from. |
| User Input | Opens a configurable dialog to capture user input to send to the OAS Server. |
User Input dialogs can be further configured with the following options:
- title: the title displayed on the dialog
- text: any additional text or instructions you choose
- formatting: the type of data to capture from the user
The last field in the Set Tag configuration is an option to Require Confirmation. This opens a final dialog that gives the user an opportunity to cancel the operation if they decide not to set the Tag. The confirmation dialog can also be configured with:
- title: the title displayed on the dialog
- instructions: any additional text or instructions you choose
- buttons: the text on the Yes/No buttons, e.g. OK, Cancel.
Set Screen Prefix
When this option is selected, triggering the event will set the Screen Prefix to the value selected or entered.
| Option | Description |
|---|---|
| Fixed Value | A static value to set for the current Screen's prefix |
| Control Value | The value of another component on the Screen. e.g. using a separate input field for capturing user input. The default is the Current Component, but other Components on the Screen that capture a value will be available to choose from. |
Go to Screen
When this option is selected, triggering the event will navigate to a selected fixed screen or dynamic based on a Component's value.
| Option | Description |
|---|---|
| Fixed Value | Select a screen in the Project/Screen hierarchy to navigate to. Optionally, setting a screen prefix as well. This allows you to re-use a screen with multiple display options based on the selected prefix. |
| Control Value | Use a Component's value to allow for dynamic navigation. You can use the format ProjectID/ScreenID/Prefix. All Screens have a unique identifier which can be located in the browser URL. Optionally, a Tag Prefix can be appended to the URL to set the prefix when the Screen loads. |
Go to URL
When this option is selected, triggering the event will navigate to an external URL.
| Option | Description |
|---|---|
| Fixed Value | Set a full URL including the protocol, such as http:// or https:// |
| Control Value | Use a Component's value to allow for dynamic navigation to a URL. |
Enabling/Disabling
When a Component has the Enabled property, this can be used to enable/disable it responding to events. The Enabled property can also be bound to a Boolean OAS Tag, allowing you to control when a Component is active based on the state of the Tag.