Getting Started Sparkplug B Host Application
OAS is can act as a Sparkplug B Edge of Network Node and Host Application.
If you would like OAS to act as an Edge of Network Node view the Getting Started Sparkplug B EoN Node setup guide.
You can view the Getting Started with Sparkplug B Video to familiarize yourself with the following steps to setup Sparkplug B communications.

- 00:00 – Introduction
- 01:10 – Download OAS
- 01:46 – Quick Start
- 02:08 – Edge of Network Node
- 05:52 – EoN Tags
- 07:04 – Host Application
- 09:20 – SpB Client Tags
- 10:22 – Programatic Interface
- 10:59 – CSV Export / Import
- 12:27 – Multiple Metric Tags
- 13:46 – Modbus
- 16:10 – DCMD Metric Write
- 17:00 – Data Route
- 17:58 – Networking
- 18:17 – Save Configuration
- 18:56 – OAS Platform
The following guide are the steps to define OAS as a Sparkplug B Host Application to receive and update Edge Node Metric values. The interface can control the online state of each Edge of Node or just act as a client.
Configure a Sparkplug B Driver
Step 1
 Start Configure OAS application from the program group Open Automation Software.
Step 2
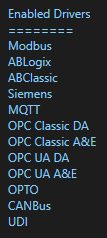
Select Configure-License and verify that MQTT is one of the available Drivers in the lower left of the form. If you do not see the MQTT driver available contact support@oasiot.com to update your license.
Note: You will need to be running Open Automation Software Version 19.0.0.53 or greater to support Sparkplug B communications. Use Configure-Options-System Status to check the version of the running OAS Engine. You can download the latest version at www.openautomationsoftware.com/downloads/open-automation-software/ or use the Update Version button under Configure-License to update to the latest version of OAS.
Step 3
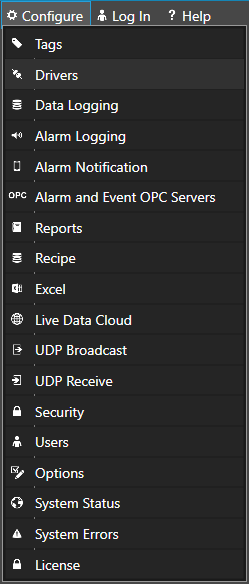
Select Configure-Drivers.
Select localhost or the remote service you wish to modify with the Select button to the right of the Network Node list.
![]()
Note: Optionally select the Live Data Cloud node if you are hosting data over the Internet with a standard Internet connection.
Step 4
Define the properties for the desired Sparkplug B host.
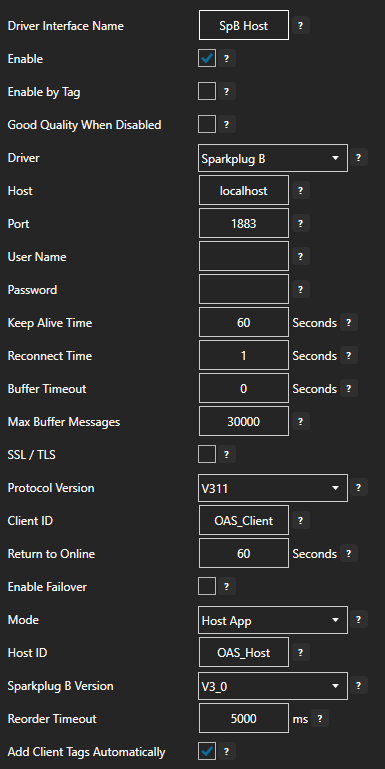
Enter a meaningful Driver Interface Name that you will refer to this physical connection when defining Tags with Sparkplug B source.
![]()
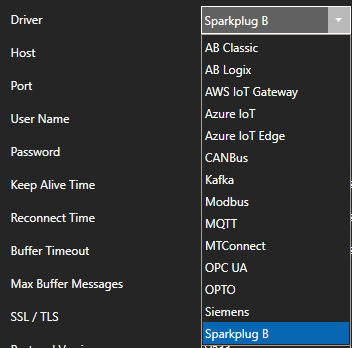
Set the Driver property to Sparkplug B.
Enter the Host property to the IP Address of the of the host broker or just use localhost for a local broker.
![]()
Set the Port property of the host broker to connect to. The default port is 1883 or 8883 for SSL.
![]()
Note: The OAS MQTT Broker can be used to host data locally. To use another broker on the default ports on the same computer change the OAS MQTT Broker Port under Configure-Options-MQTT Broker.

Enter the User Name and Password if required.
Keep Alive Time – Default is 60 Seconds.
Reconnect Time – Default 1 Second. If the connection to the broker is lost the Reconnect Time determines how long to wait before attempting to reconnect.
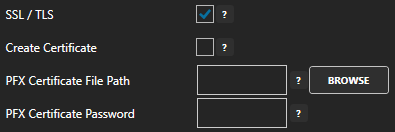
To connect with Transport Layer Security enable the property SSL / TLS.
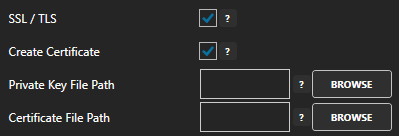
Specify the Private Key File and Certificate File to use.
Uncheck the property Create Certificate to specify a PFX Certificate File and PFX Certificate Password.
Set the MQTT Protocol Version to V311 or V500.
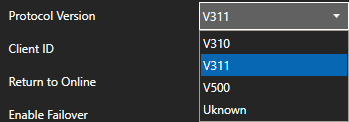
Set the Client ID to a unique value, each driver interface must have a specific value different than all other clients connecting to the host.
![]()
Optionally define a secondary failover Host Broker if the primary Host Broker fails with the property Enable Failover.
If both the primary and secondary broker are offline the Return to Online settings determines the retry frequency.
View Driver Interface Failover for more information and and video demonstrating communications failover.
Set the Mode to Host App for OAS to control the online state of each Edge of Node defined to the shared Host Application ID.
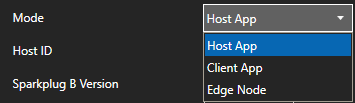
Note: To enable a communication interface to Edge of Nodes, but not set the state of the Host ID set the mode to Client App.
Set the Host ID to the specific value that the Edge of Nodes will be using as the Host Application ID.
![]()
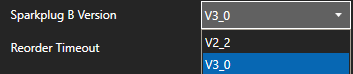
Set the Sparkplug B Version to 2.2 or 3.0.
To automatically add tags for each Metric from the matching Group, Edge of Nodes, and Devices enable the property Add Client Tags Automatically.
![]()
When enabled optionally set the Filter Groups, Edge Nodes, and Devices that tags should be added from for each of their Metrics. Leave the Filter fields blank to include all Edge of Nodes publishing data to the broker.
Step 5
Select the Add Driver button in the left part of the form to add the Driver Interface as an available selection when defining Tags in the next step.
![]()
Note: If you need to define several Driver Interfaces you can use the CSV Export and CSV Import on the toolbar in the upper right together with Microsoft Excel. You can also programmatically define drivers using the .NET OASConfig assembly or OAS REST API.
Defining Metric Data from Edge Nodes
Step 1
Select Configure-Tags.
Select localhost or the remote service you wish to modify with the Select button to the right of the Network Node list.
![]()
Note: Optionally select the Live Data Cloud node if you are hosting Allen Bradley data over the Internet with a standard Internet connection.
Step 2
Note: If the Driver Interface property Add Client Tags Automatically was enabled tags will be created for you, you can skip this step to add tags manually.
Select to Add a Tag.
Note: You can also add organizational Groups as many levels deep as you prefer and add tags to groups. To do this first add a Group to Tags Group at the root level, then right click on the Group in the right window to add additional Groups or Tags.
Step 3
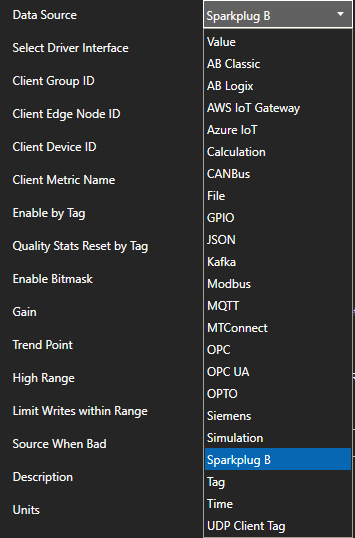
Change the Data Source Tag property to Sparkplug B.
Step 4
Select the correct Driver Interface from the Driver Interface pull down list.

Step 5
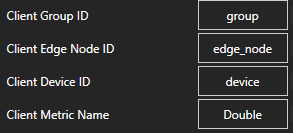
Specify the Client Group ID, Client Edge Node ID, Client Device ID, and Client Metric Name for the Edge of Node Metric value to read and write.
Step 6
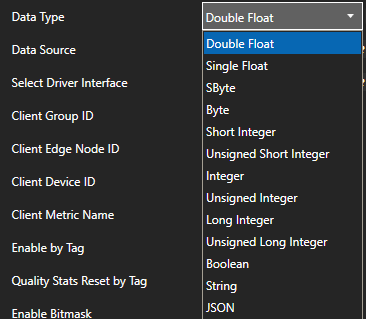
Select the Data Type of the Tag to match the data type of the Metric.
Step 7
Select Apply Changes and the current value for the Metric should appear with Good Quality.
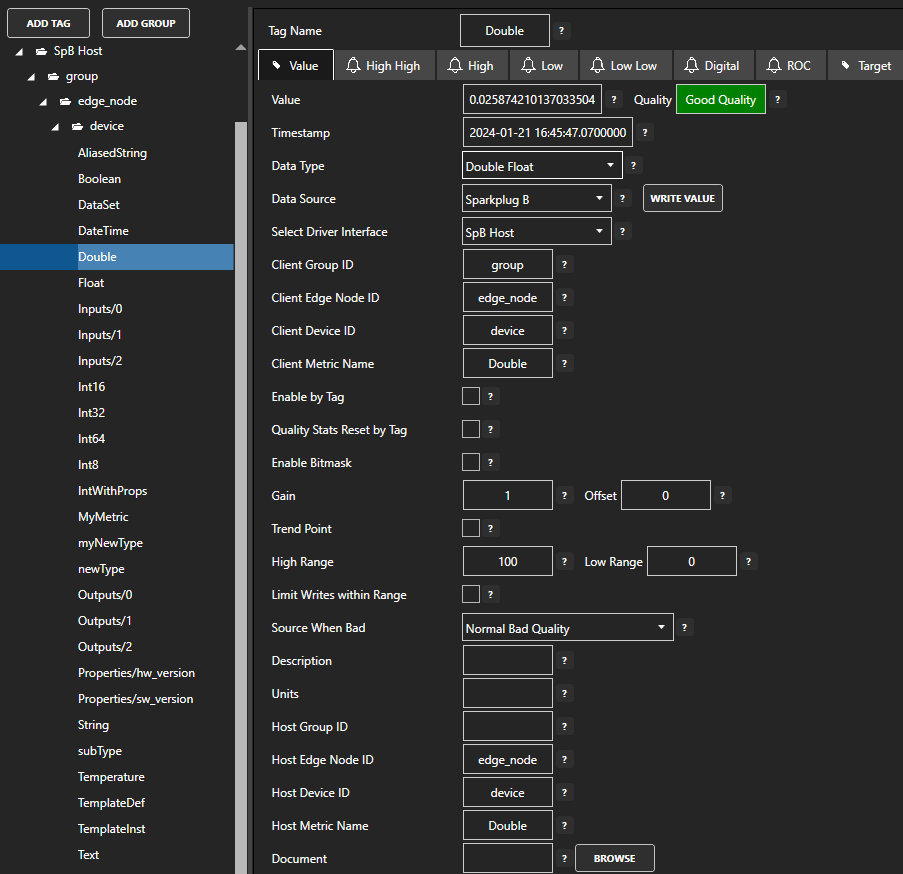
Note: The above tag was automatically created using the Sparkplug B Test Compliance Kit as an Edge of Node source.
Step 8
To setup automated data transfer of any OAS Tag to and from the Sparkplug B Tags see Getting-Started – Data Route.
Step 9
To define multiple tags use the CSV Export and CSV Import on the toolbar in the upper right together with Microsoft Excel.
Note: You can also programmatically define Tags using the free to use .NET OASConfig assembly or OAS REST API.
Step 10
Select the Save button on the toolbar at the top.
