Linux Installation
Prerequisites
For any Linux installation, general knowledge of Linux server configuration is required.
This includes being comfortable with the following tasks:
- managing user accounts
- managing files and user permissions
- transferring files between machines
- networking configuration
- configuring services (daemons in systemd)
While OAS is happy to support the OAS installation and any issues related to the product, support does not include managing Linux server configuration and administrative tasks.
Deployment
Copy OASEngine files to Linux server/device
After downloading the Linux OAS Engine from the OAS Downloads page extract the contents of the .ZIP file (e.g. oas-linux.zip) to any directory of the Linux operating system. The contents can be copied to the target Linux machine directly, or you can copy the .ZIP archive and unzip on the Linux machine itself.
Installation Script
Note: Perform the installation on your Linux system using root access or with an account with sudo privileges.
The following are instructions for using the included installation script. This script has been thoroughly tested on Ubuntu, but may not work properly in all Linux distributions. For example some scripted operations are blocked on Debian and Debian variants such as Raspbian. If you experience issues running the script or if the OAS server does not start after running the script, we suggest using the Manual Installation method.
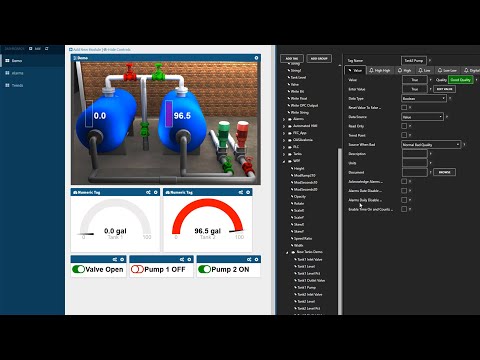
View the following video to view the following steps implemented with Ubuntu on a Raspberry Pi device.
Run the installation script to properly configure the OASEngine
Log into your Linux machine with an account that has root or sudo permissions. Either connect to the machine from an SSH session, or open a terminal on the machine itself, if you’re using a GUI.
Navigate to the daemon directory within the installation path and locate the oas_install.sh script. In this example, we’re using the ARM64 installation on a Raspberry Pi 4 running Ubuntu, but the same instructions and commands apply to any Linux distribution.
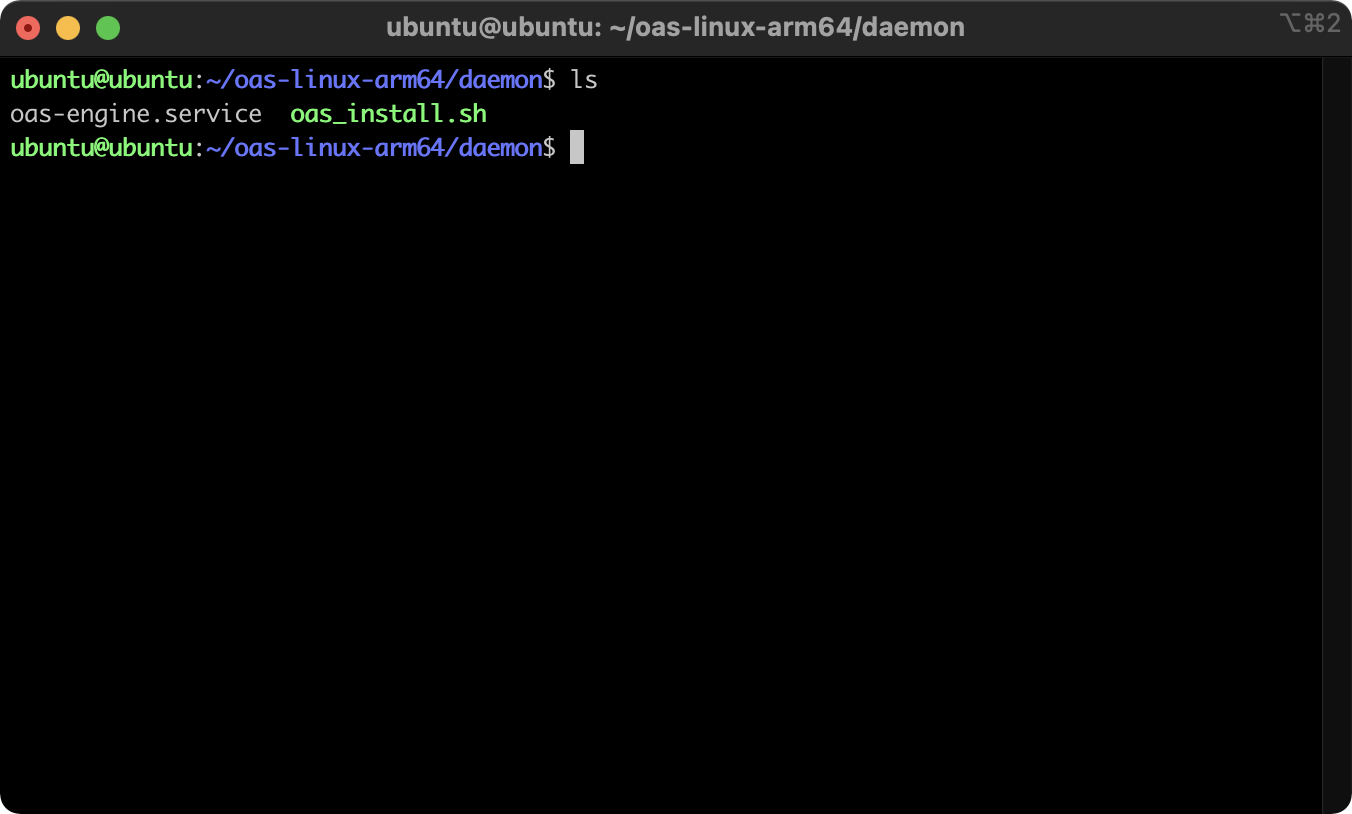
Ensure the installation script is executable, then run the installation using the following commands:
sudo chmod +x oas_install.sh
sudo ./oas_install.sh
NOTE: When you execute any script on Linux and receive an error such as “No such file or directory”, this may be resolved by converting the file to unix-type line breaks. This can be done with the command dos2unix which is installed using the following command on many Linux distributions:
sudo apt updatesudo apt install -y dos2unix
You will be prompted to enter the password for the root or administrator currently logged in if you don’t currently have sudo permissions.
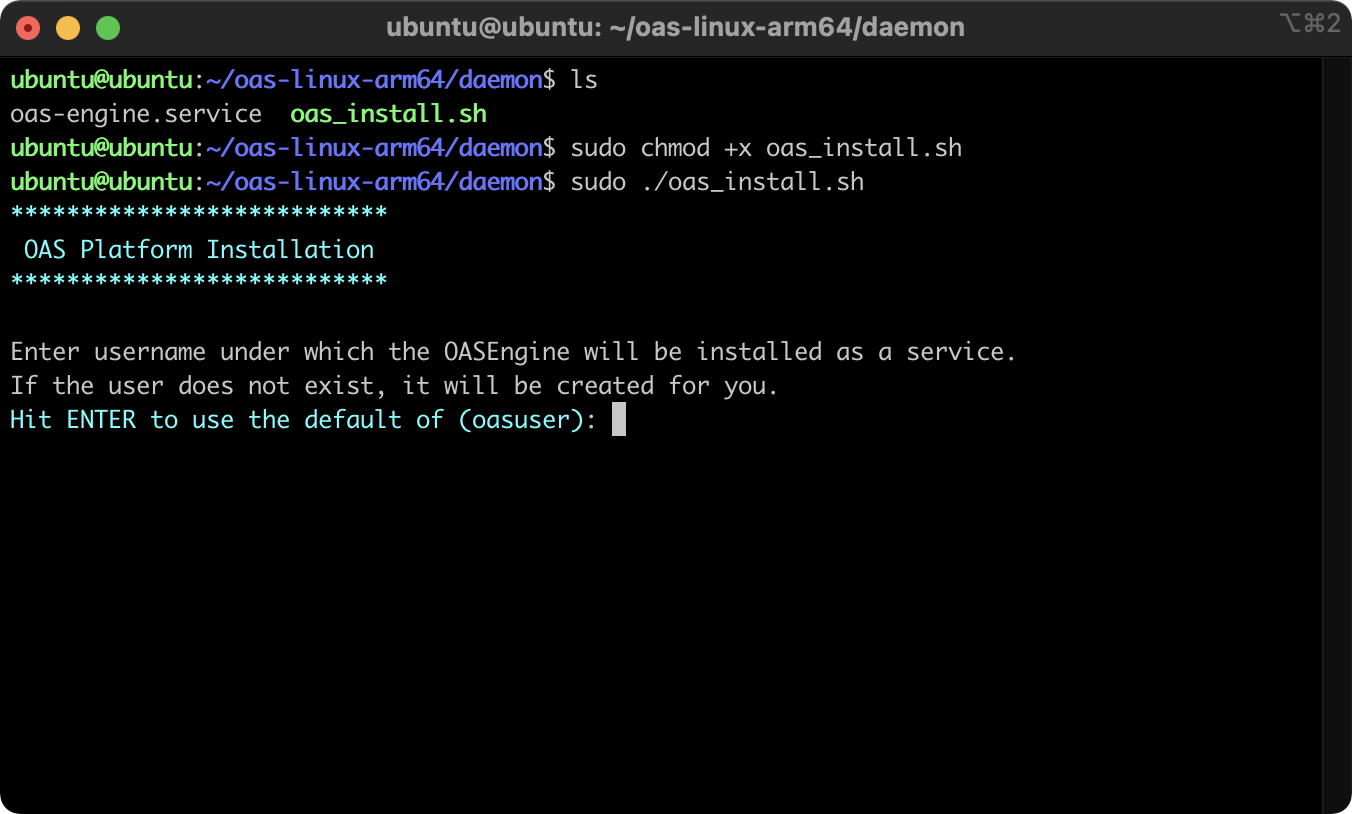
The installation script will next walk you through the following:
- Creating or selecting a user account for the OASEngine service. Using the defaults, an account called oasuser will be created.
- Installing the service in the selected user’s account
- Optionally starting the newly installed service
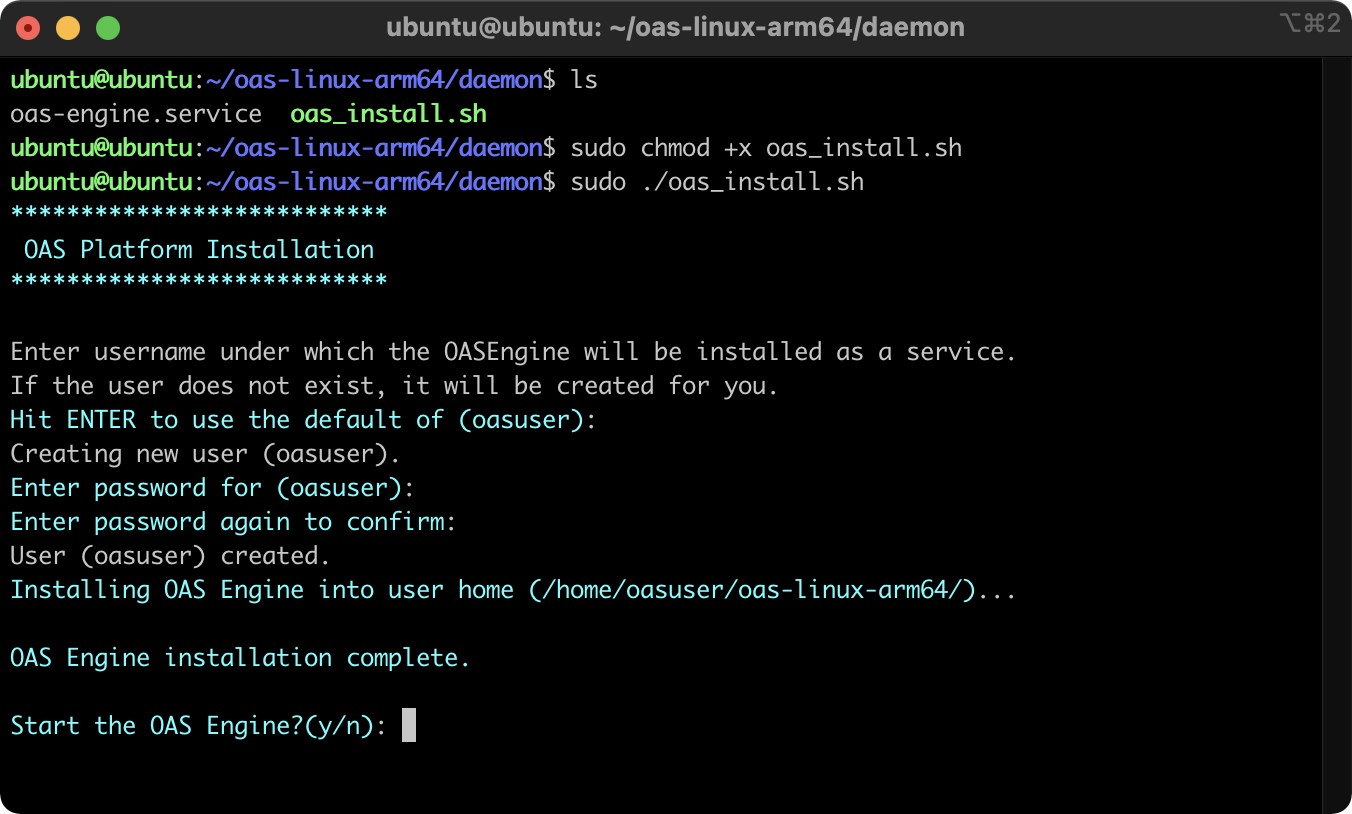
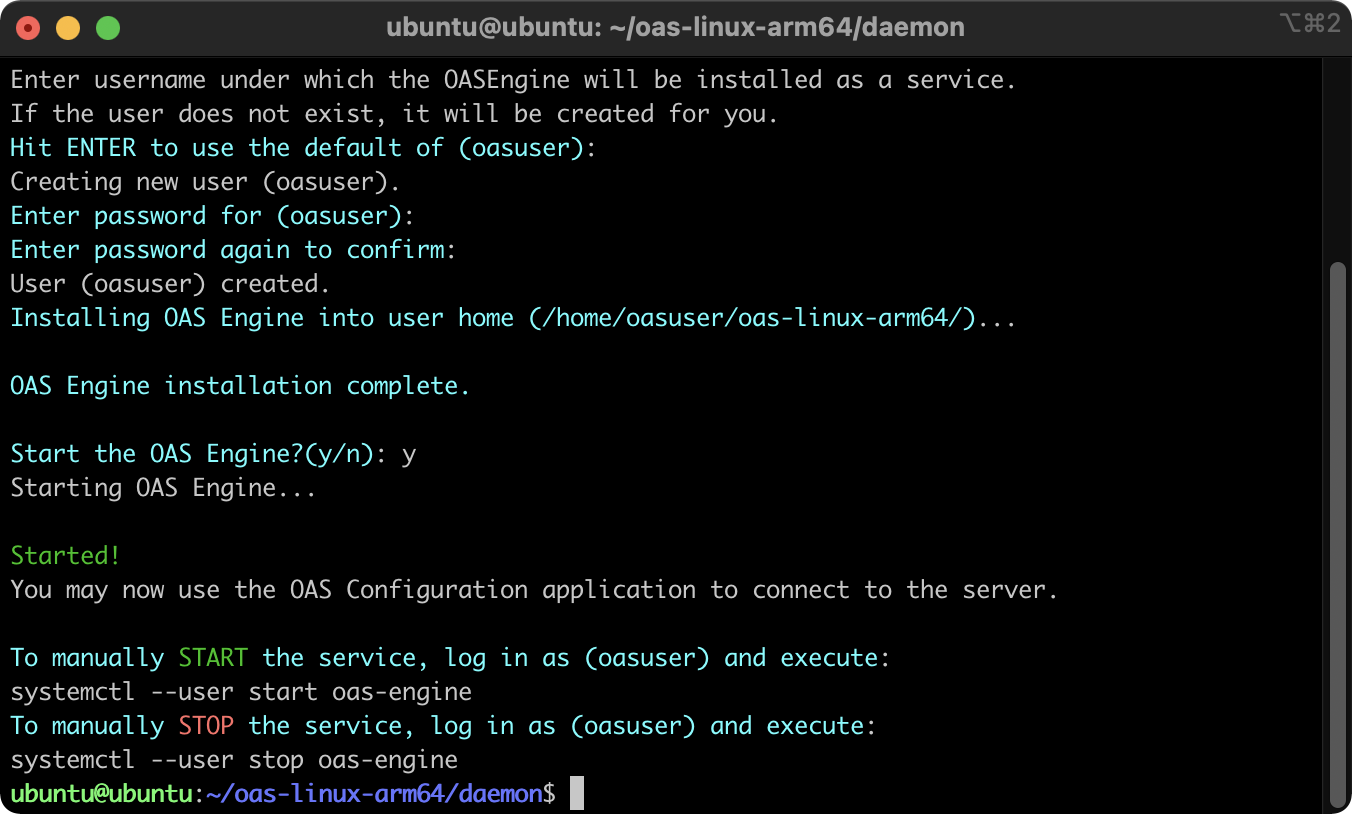
The OASEngine is now installed as a user service or daemon under the account selected or created (default: oasuser). This service is managed by systemd and can be controlled or monitored like any systemd service. By default, the OASEngine is now configured to start up when the machine reboots.
On a Windows PC, open the OAS Configuration Application and connect to the running Linux service for configuring and controlling the server. Ensure that the PC Firewall allows TCP communication on port 58727. For more information on configuring an OAS installation see the documentation for the OAS Configuration Manager application.
Manual Installation
Unless noted, all operations below must be performed under the root account, or using an account with sudo permissions.
Create a Service User Account
The following commands will create a user named oasuser, however you can use any valid username. If not using the default oasuser name, be sure to use that name in further instructions where oasuser is mentioned.
sudo useradd -m oasuser
sudo loginctl enable-linger oasuser
sudo passwd oasuser
The passwd command will prompt you to enter and confirm a password for this user. Be sure to store this password securely as it will be needed for logging in and managing the OAS Service.
Copy OAS Service files to Service User’s home
Copy the unzipped installation directory to the OAS Service user’s home. Then set ownership of the installation directory and contents to the OAS Service user. In this example, the install directory is oas-linux, but depending on the version being used, this may also be oas-linux-arm or oas-linux-arm64.
sudo chown -R oasuser:oasuser /home/oasuser/oas-linux
Configure OAS Service to start on boot
Edit the oas-engine.service file located in the daemon directory within the installation path using nano, vi or your favorite text editor on Linux. Modify the file by changing references to oasuser to your OAS Service username if you have chosen another, and modify the oas-linux path to oas-linux-arm or oas-linux-arm64 if you are using either of those versions. Make all modifications necessary for the file to resemble the one below:
[Unit]
Description=Open Automation Software Engine

[Service]
ExecStart=/home/oasuser/oas-linux/OASEngine
WorkingDirectory=/home/oasuser/oas-linux
SyslogIdentifier=oas-engine
PrivateTmp=false
KillMode=process

[Install]
WantedBy=default.target
Save and copy the oas-engine.service file to the .config directory using the commands below, again replacing oas-linux in the path as necessary:
sudo mkdir /home/oasuser/.config/systemd/user/
sudo cp /home/oasuser/oas-linux/daemon/oas-engine.service /home/oasuser/.config/systemd/user
Log out and log back in as the OAS Service user (oasuser) to complete the installation.
Enable and start the OAS Service
systemctl --user enable oas-engine
systemctl --user start oas-engine
Uninstall
Included with the OAS installation script is an uninstaller, as well. This file is oas_uninstall.sh and located in the same directory as the installation script. Similarly, you will need to mark this file for execution before running it. Only use this script if the installation script was successful. Use the following commands to mark for execution and then start the uninstaller:
sudo chmod +x oas_uninstall.sh
sudo ./oas_uninstall.sh
The uninstaller script will attempt to back out the installation by performing the following actions.
- Stop the OASEngine service
- Remove all installation files
- Remove user account created for running the service (optional)
When prompted to remove the OAS user account, you can choose ‘no’ to keep the account intact.
For manually uninstalling the OAS Service:
Log into the account created for running the OAS Service
Stop the OASEngine
systemctl --user stop oas-engineDisable the systemd service
systemctl --user disable oas-engineYou can optionally remove the entire installation directory from the Service User account home or leave it in place if you plan on using OAS again at some point.
Service Control
Confirm that the service is running
Log into the Linux machine using the credential created during the installation. By default this is oasuser. Then, execute the following command to determine the oas-engine status:
systemctl --user statusThis should return something similar to:
State: running
Jobs: 0 queued
Failed: 0 units
Since: Mon 2021-03-01 16:34:33 UTC; 3 weeks 6 days ago
CGroup: /user.slice/user-1001.slice/user@1001.service
├─oas-engine.service
│ └─2214 /home/oasuser/oas-linux-arm64/OASEngine
If you do not see the oas-engine.service listed as running, you can begin troubleshooting by attempting to run the OASEngine manually and checking for errors on startup in the console. To do this, locate the OASEngine executable within the installation directory for the user. This will be in the user’s home directory and named oas-linux, oas-linux-arm, or oas-linux-arm64 depending on the version installed. Within this directory, execute the following:
./OASEngineThis will directly start an instance of the service and output feedback on status. If any errors are reported on startup, make note of them and contact OAS Support for more information.
Managing the Service Installation
The installation script created a service configuration file that can be modified with any additional parameters, such as restart behavior. This is particularly useful if you want to automatically restart the OASEngine in the unlikely event that the process is killed or interrupted. You can locate the service configuration file on following path when logged in as the selected user:
~/.config/systemd/user/oas-engine.serviceThe contents of the file are the following, with the paths adjusted for the specific user and depending on the specific Linux distribution you are using:
[Unit]
Description=Open Automation Software Engine

[Service]
ExecStart=/home/oasuser/oas-linux-arm64/OASEngine
WorkingDirectory=/home/oasuser/oas-linux-arm64
SyslogIdentifier=oas-engine
PrivateTmp=false
KillMode=process

[Install]
Once you log into the Linux machine as the selected user, you can gracefully stop and start the service using the following commands:
Stop the service:
systemctl --user stop oas-engineStart the service:
systemctl --user start oas-engine
Troubleshooting
The installation script throws errors or returns a ‘No such file or directory’ message
The file may contain incompatible line endings for Linux – see the instructions above for fixing this using the dos2linux command.
The Linux distribution you are using (e.g. Debian and variants) may be incompatible with the installation script. Follow the Manual Installation instructions.
The service does not start on reboot
Ensure that the service is enabled. Log into the server with the OAS Service account created or referenced during the installation – by default this is oasuser. Then execute the following command:
systemctl --user enable oas-engineAlso, be sure that the OAS Service user can run unattended and does not require a login session for services to run. Logged in as root or sudo user, execute the following command:
sudo loginctl enable-linger oasuserAny other issues?
Contact support@oasiot.com and we will evaluate your configuration and determine the cause.