Tag to Tag – Data Route
One to One Tag Transfer
View the following video for a demonstration of transferring a value from one tag to another.
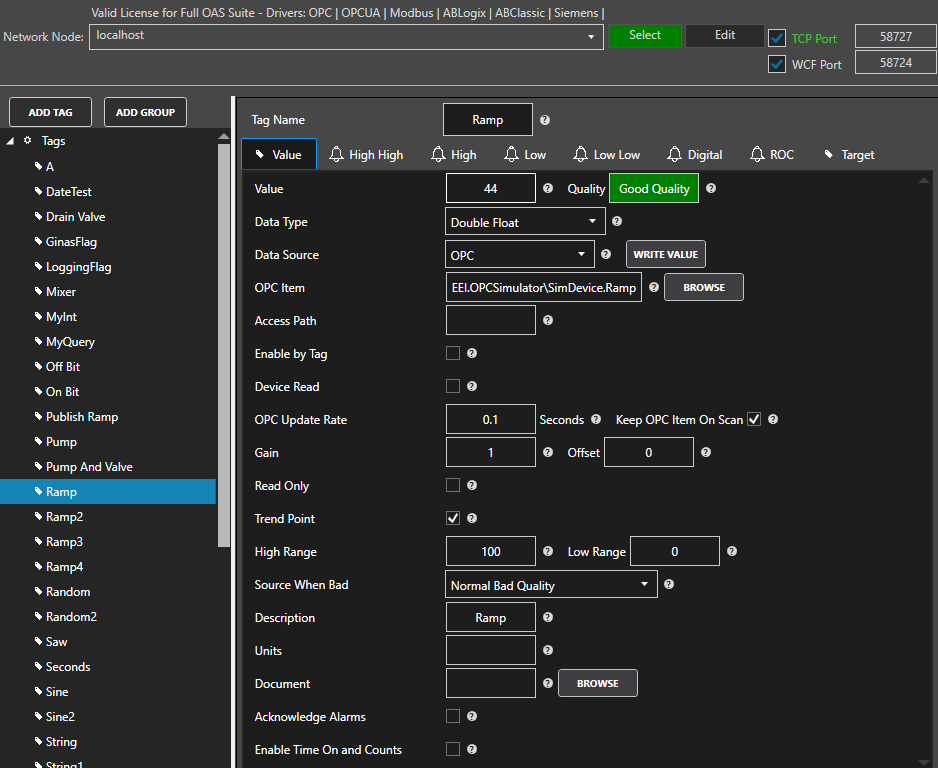
Step 1 – Define Source Tag
Create the driver see the appropriate data source in the Data Sources Section (If using Classic OPC or Calculations as a source skip this step)
Create the source Tag. Refer to Configure – Tags for additional information on tag configuration.
Step 2 – Define Destination
Select the Target Tab
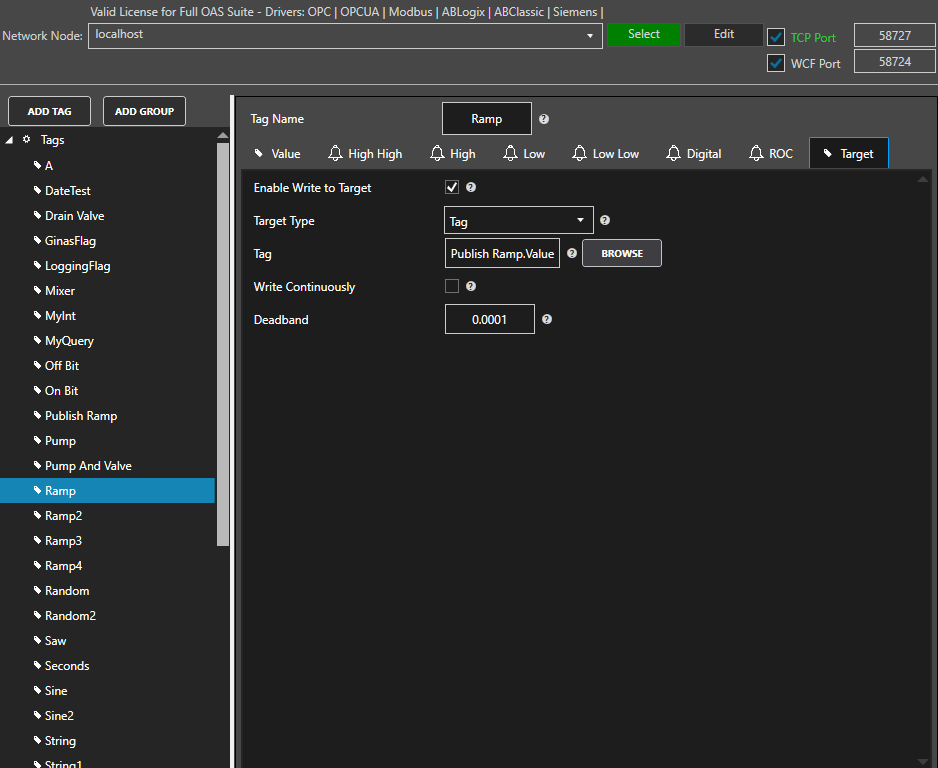
On the target tab check Enable Write to Target
Select the Target Type (Tag, OPC, Azure IoT, Azure IoT Edge, or MQTT )
Select the destination for the value to be sent.
If Tag is selected then select Browse and select the desired OAS tag.
![]()
Value is the most commonly used Variable. See Tag Variables for a complete list of all Variables possible.
Note: You can also browse remote tags on other services to transfer data over a network.
\\192.168.0.1\TagName.Value
If OPC Item is selected select browse and select the OPC server and Item

If Azure IoT or MQTT is selected then select Browse and select the desired Driver

Enter the desired Deadband in the Float Deadband field. Enter 0 for no deadband.
If you want to specify a desired update frequency for the target check Write Continuously and enter the desired frequency. If Write Contentiously is unchecked the the target will be updated every time the source tag changes.
Click Apply Changes
![]()
The data route from tag to tag is now active.
Step 3 – Save Configuration
Select the Save button on the toolbar at the top to save the updates to the tag configuration.

If this is the first time saving you will be prompted to make this the default configuration to load when the OAS Engine restarts.
This default file location can be changed under Configure-Options-Default Files.