IoT Publish – Data Route
Publish Tag Values to IoT Cloud
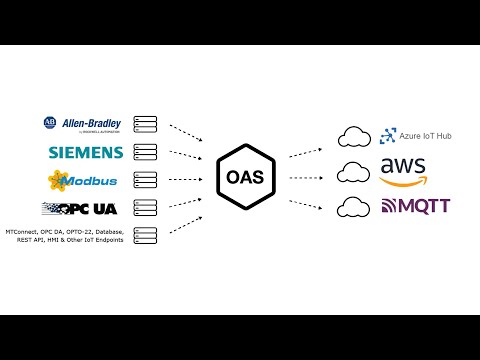
View the following steps to enable Tag Publish feature to Kafka Brokers, MQTT Brokers, Azure IoT, and AWS IoT Gateway.
View the following video for a complete demonstration of how to publish data to Kafka Brokers, MQTT Brokers, Azure IoT, and AWS IoT Gateway.
- 00:00 – Introduction
- 00:23 – Set up Tags in OAS
- 00:41 – Configure Azure IoT
- 01:53 – Publish Selected Tags
- 05:31 – Visual Studio Code
- 08:00 – Step by step instructions
- 08:12 – Bulk Publish to AWS IOT
- 09:21 – Step by step instructions / Publish Data to AWS IOT Gateway
- 09:33 – Bulk Publish to mqtt broker
- 10:29 – MQTT Explorer
- 11:20 – Step by step instructions/ Getting Started MQTT
- 11:34 – Save button of the OAS Configuration tool
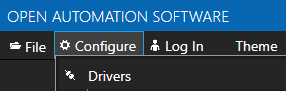
Step 1 – Configure Driver
Select Configure-Drivers to select Kafka, MQTT, Azure IoT, or AWS IoT Gateway depending on when destination you want to publish tag values to.
Step 2 – Define Tag Variables to Publish
Enable Publish Selected Tags at the bottom of the Driver configuration.
![]()
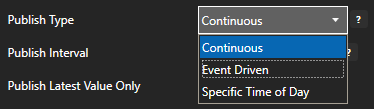
Select to publish data continuously at a specified interval, based on event, or at a specific time of day.
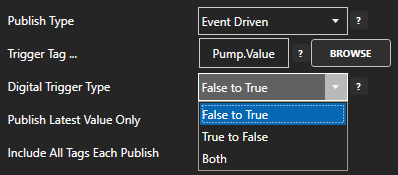
If Event Driven browse for a local or remote OAS tag that will trigger the publish. Select a Boolean tag that will change state from false to true, true to false, or both. Or choose an Integer tag that trigger a publish anytime the value changes other than 0.
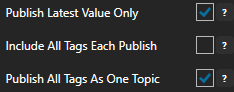
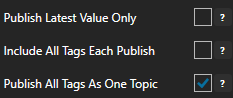
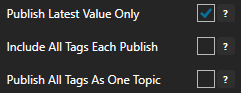
Enable Publish Latest Value Only to send only the latest value of each tag when published or disable to send all value changes since the last time a publish occurred.
Enabled Include All Tags Each Publish to send at least the latest value of each tag when published or disable to only send the tags that have changed since the last publish.
Enable Publish All Tags As One Topic to publish all tag values as one topic or disable to send each tag as its own topic.
See Data Example at the end of this step for each selectable option.
Specify the Publish Topic Id if choosing to Publish All Tags As One Topic.
When publishing as one topic to optimize communications with Kafka multiple messages are sent for each publish when the number of tag value changes exceeds the Max Tags Per Publish limit.
![]()
Specify the Tag Id, Value Id, an optional Quality Id, and Timestamp Id for each tag value that is sent.
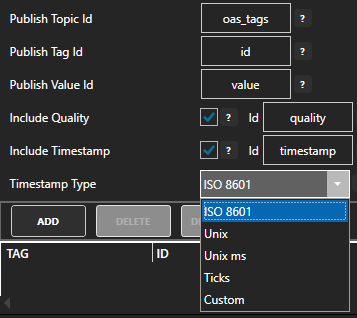
When including the Timestamp Id also specify the timestamp format, use Custom to specify your own date and time format.
Specify local and remote OAS tag variables to include in each publish and specify the Id. Value is the current value from the data source or you can select any of the over 600 tag variables of each tag to publish.
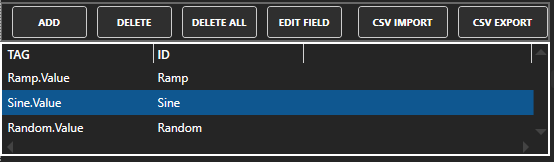
Optionally use CSV Export and CSV Import buttons to set up additional tags to publish using Microsoft Excel.
When selecting remote tags use Basic Networking syntax or Live Data Cloud syntax in the tag path.
Select Apply Changes to begin publishing.
Data Examples:
Examples of publishing every 2 seconds with each tag value changing every second:
Step 4 – Save Configuration
Select the Save button on the toolbar at the top.

If this is the first time saving you will be prompted to make this the default configuration to load when the OAS Engine restarts.
This can be changed under Configure-Options-Default Files.