Getting Started – Trend and Alarm Dashboard
You can view Trends and Alarms Dashboard video to review the steps of using this application.

- 0:00 – Introduction
- 0:06 – what’s Trend and Alarm Historian Application
- 0:30 – Pens Groups
- 0:41 – Trend Windows
- 0:51 – Include Pens to Trend Window
- 1:13 – Pens Properties
- 1:27 – Trend Type
- 1:34 – Time Frame
- 2:04 – Stack Chart Mode
- 2:28 – View
- 2:52 – Trend Window – Workspace
- 3:09 – Pens Group
- 3:16 – Add Pen Group
- 4:08 – Duplicate Pen Group
- 4:31 – How to use the Pens
- 4:39 – Create a new Window without pens
- 5:34 – Alarms Panel
- 5:41 – Activate Alarms Windows
- 6:24 – Customize Alarm Window
- 6:55 – Modifying Attributes
- 8:21 – Docking Panels
- 8:33 – More Questions – Contact Us
- 9:05 – Training Page – more videos
Menu
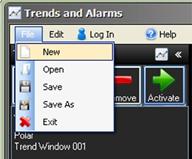
- File-New: Clears all trend, pen groups, and alarm windows and starts with a blank configuration.
- File-Open: Opens an existing configuration previously saved.
- File-Save: Saves the current configuration with the existing file name. This will save the list of Trend, Pen Groups, and Alarm Windows and the current list of Windows in the View Window.
- File-Save As: Saves the current configuration and with a desired file name.
- File-Exit: Exit the application.
Trend Navigator Bar
![]()
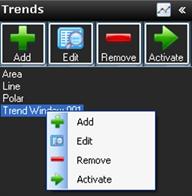
The Trend Navigator Bar is used to add, modify, and delete Trend Windows that can be selected to be added to the current view configuration.
To view the list of Trends select the Trends button at the bottom of the Navigator Bar.
Add Trend:
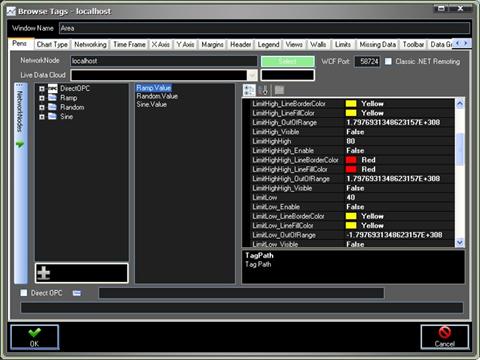
![]() Select the Add button to add a Trend Window to the configuration. This will display the Trend Window setup form.
Select the Add button to add a Trend Window to the configuration. This will display the Trend Window setup form.
You can define a list of pens to be used with the trend on startup or use the Pen Groups feature and leave the list of Pens blank.
Networking:
If you will be deploying the Trends and Alarms Dashboard configuration to remote PCs or using the application on a different PC than where the OAS Engine resides implement either Basic Networking syntax or Live Data Cloud Networking syntax by entering the IP Address or Network Node in the Network Node field and click Select or optionally select the Live Data Cloud node where the tags are hosted.
Local Tag
myGroup.myTag.Value
\\192.168.0.1\myGroup.myTag.Value
Live Data Cloud Networking from local OAS Engine
RemoteSCADAHosting.myLiveDataCloudNode.myGroup.myTag.Value
Live Data Cloud Networking though remote OAS Engine
\\192.168.0.1\RemoteSCADAHosting.myLiveDataCloudNode.myGroup.myTag.Value
Enter the desired Trend Window Name that will identify the Trend Window in the configuration. You must use a unique name that does not already exist.
Select OK to accept the changes or Cancel to abort the recent changes to the window.
Make sure to select File-Save if you add a Trend Window.
Edit Trend:
![]()
Select an existing Trend Window from the Trend List and then Modify button to modify the Trend Window. This will display the Trend Window setup form.
Remove Trend:
![]()
Select one or more existing Trend Windows from the Trend List and then the Remove button to remove the Trend Windows from the configuration.
Make sure to select File-Save if you remove a Trend Window.
Activate Trend Window:
![]()
Select a Trend Window from the Trend List and then the Activate Trend Window button or simply drag the Trend Window name into the main application to add the Trend Window to the view screen. You can add the same Trend Window more than once if you desire as you can make on-line modifications.
Once the Trend Window is activated the window can be left as free floating to any size or location or it can be docked within the main docking area.
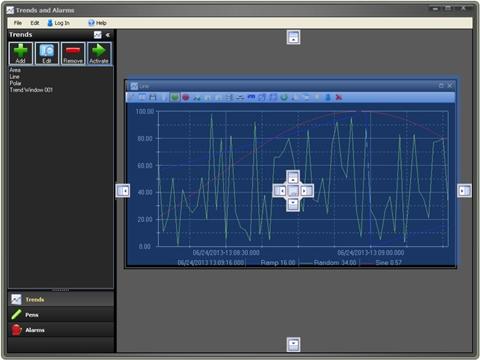
Select File-Save after the Trend Window is docked or placed into the location you would like it to be.
Pens Navigator Bar
![]()
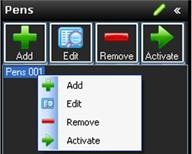
The Pens Navigator Bar is used to add, modify, and delete Pen Groups that can define a list of pens to add to an existing Trend Window that is activated.
To view the list of Pen Groups select the Pens button at the bottom of the Navigator Bar or select Edit-Pens.
Add Pens:
![]()
Select the Add button to add a Pen Group to the configuration. This will display the Pens setup form.
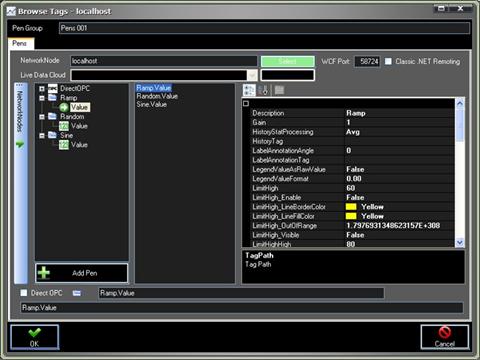
Enter the desired Pen Group Name that will identify the list of Pens in the configuration. You must use a unique name that does not already exist.
Select OK to accept the changes or Cancel to abort the recent changes to the Pen Group.
Make sure to select File-Save if you add a Pen Group.
Edit Pens:
![]()
Select an existing Pen Group from the Pens List and then Edit button to modify the Pen Group. This will display the Pens setup form.
You can use the Edit function to also clone an existing Pen Group to a new Pen Group simply by specifying a Pen Group name in the pens properties dialog.
Select OK to accept the changes or Cancel to abort the recent changes to the Pen Group.
Make sure to select File-Save if you modify the Pen Group.
Remove Pens:
![]()
Select an existing Group from the Pens List and then the Remove button to remove the Pen Group from the configuration.
Make sure to select File-Save if you delete a Pen Group.
Activate Pens:
![]()
Select an existing Pen Group from the Pens List and then drag the pen name to one of the trend windows that are currently activated.
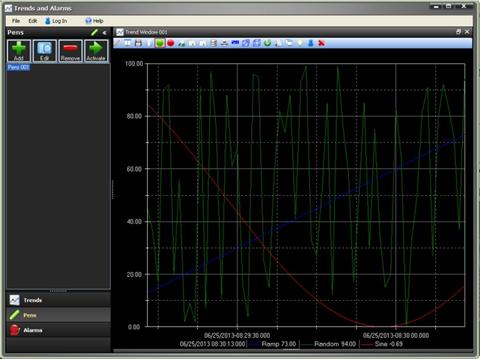
Select File-Save after the Pens have been activated to a trend window.
Alarm Navigator Bar
![]()
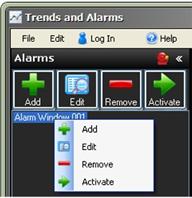
The Alarm Navigator Bar is used to add, modify, and delete Alarm Windows that can be selected to be added to the current view configuration.
To view the list of Alarms select the Alarms button at the bottom of the Navigator Bar or select Edit-Alarms.
Add Alarm:
![]()
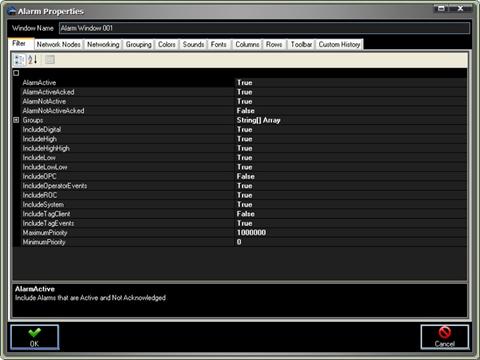
Select the Add button to add an Alarm Window to the configuration. This will display the Alarm Window setup form.
Networking:
If you will be deploying the Trends and Alarms Dashboard configuration to remote PCs or using the application on a different PC than where the OAS Engine resides use the Networking tag to select all remote nodes where the alarms will be hosted from.
Enter the desired Alarm Window Name that will identify the Alarm Window in the configuration. You must use a unique name that does not already exist.
Select OK to accept the changes or Cancel to abort the recent changes to the window.
Make sure to select File-Save if you add an Alarm Window.
Edit Alarm:
![]()
Select an existing Alarm Window from the Alarm List and then Edit button to modify the Alarm Window. This will display the Alarm Window setup form.
You can use the Edit function to also clone an existing alarm window to a new alarm window simply by specifying a new window name in the alarm properties dialog.
Select OK to accept the changes or Cancel to abort the recent changes to the window.
Make sure to select File-Save if you modify the Alarm Window.
Remove Alarm:
![]()
Select an existing Alarm Window from the Alarm List and then the Remove button to remove the Alarm Window from the configuration.
Make sure to select File-Save if you delete an Alarm Window.
Activate Alarm Window:
![]()
Select an existing Alarm Window from the Alarm List and then the Activate button to add the Alarm Window to the view screen. You can add the same Alarm Window more than once if you desire as you can make on-line modifications.
Once the Trend Window is activated the window can be left as free floating to any size or location or it can be docked within the main docking area.
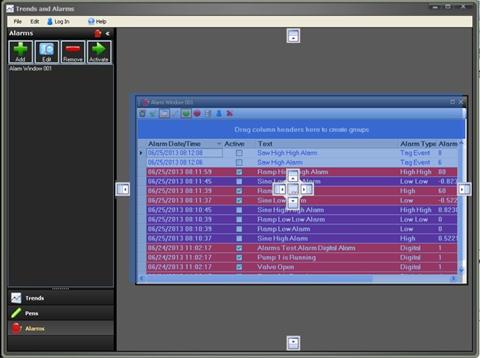
Select File-Save after the Alarm Window is docked or placed into the location you would like it to be.