One Click OPC
Tags can be automatically setup by using the One Click OPC feature that browses OPC Servers automatically and creates tags based on the OPC Items defined in the OPC Server. You can then delete tags from the configuration that you do not want.
View the following 2 minute video on how to use the One Click OPC Feature or follow the steps in the table below.
Step 1
 Start Configure OAS application from the program group Open Automation Software.
Step 2
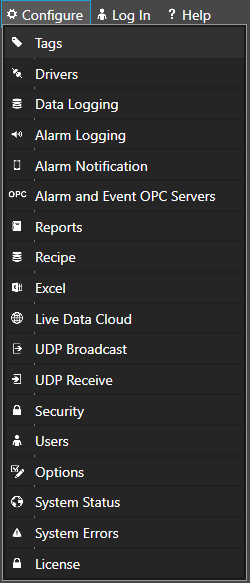
Select Configure-Tags.
Step 3
Select the Local OAS Service by selecting the Select button.
![]()
Step 4
To begin the One Click OPC process select the Group you would like to import to in the Tag configuration. If you want to import to the Root Level, select the Tags Group at the top of the tree.
Then select the One Click Import button on the top menu bar.

Step 5
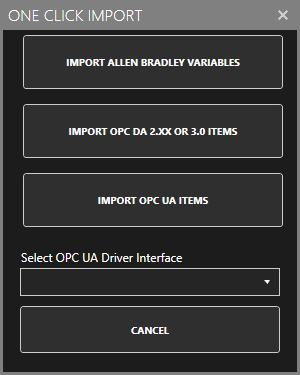
Click on the Import OPC DA 2.XX or 3.0 Items Button in the pop up window.
Step 6
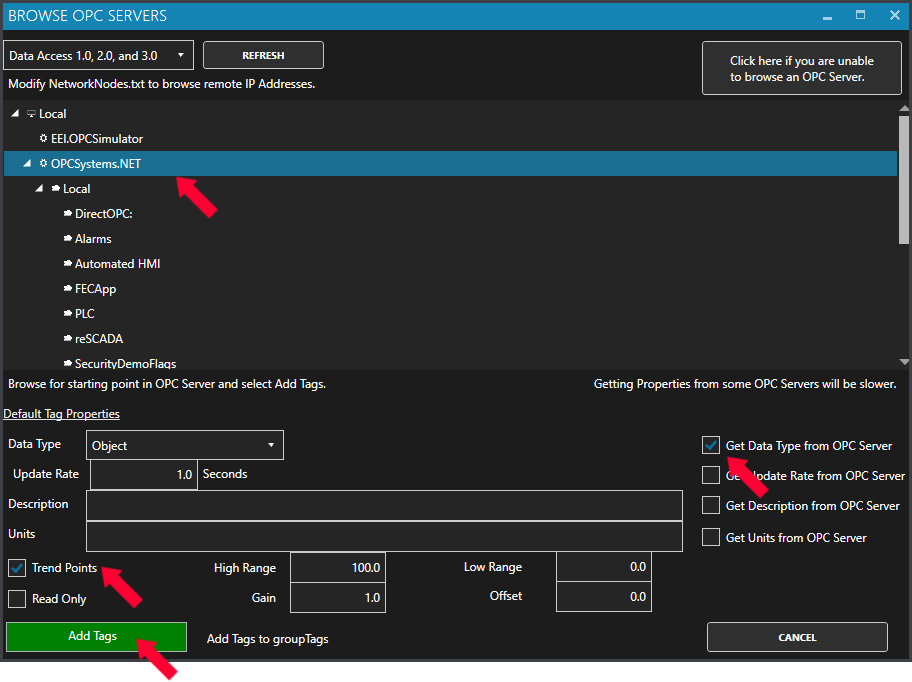
Use the One Click OPC Wizard to browse for a branch as a starting position within an OPC Server or just select the OPC Server name itself to add all items from the selected OPC Server. For the best networking design select OPC Servers from Local even if you are configuring a remote OAS Service.
Step 7
Select to enable the options to Get Data Type from OPC Server and optionally the Descriptions.
Additionally if you want to specify to Trend all of the points select Trend Points.
Step 8
Click Add Tags and it will automatically add all of the OPC Items from the OPC Server Branch you have selected and all sub Branches beneath it.
Step 9
Select the Save button on the toolbar at the top.

Step 10
Under Configure – Options set the Default Tag Configuration File so when the computer restarts the tag file will automatically be loaded.